How to accept Stripe payments with a WordPress form, without extra fees
Some free form plugins charge their own fee on each payment until you upgrade. Fennec Forms connects to your own Stripe account with your own API keys, so the only fee is Stripe’s normal processing fee. Visitors pay on Stripe’s hosted Checkout page, so card details never touch your site.
Updated · Written for Fennec Forms 1.0.0 · Screenshots from a real WordPress install running the free plugin
What you need
- A WordPress site running WordPress 6.9 or later and PHP 8.1 or later
- A Stripe account (test mode is fine while you set up)
- Fennec Forms installed
Steps
Step 1: Install Fennec Forms
Download the free plugin from fennecpress.com, then in wp-admin go to Plugins → Add New → Upload Plugin, choose the zip and activate it. It needs WordPress 6.9+ and PHP 8.1+. There is no account to create and no license key.
Step 2: Add your Stripe keys
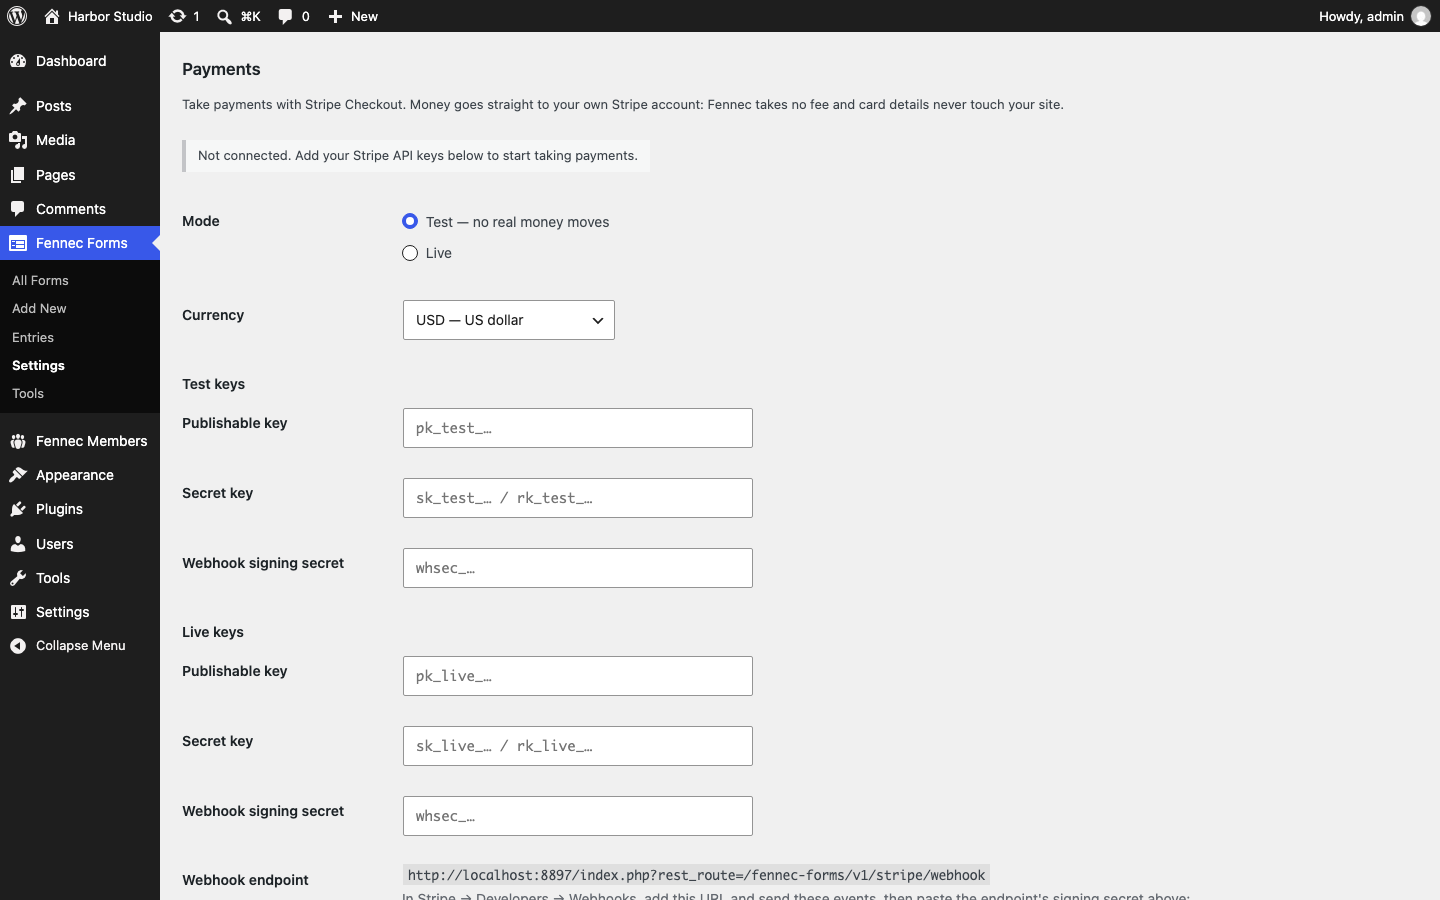
Go to Fennec Forms → Settings → Payments. Leave Mode on “Test”, choose your currency, and paste your Stripe test publishable key and secret key (a restricted key works too). Test and live keys are stored separately.
Step 3: Add the webhook in Stripe
The Payments section shows a webhook endpoint URL and the events to send. In Stripe, go to Developers → Webhooks, add that URL with those events (checkout.session.completed, checkout.session.async_payment_succeeded, checkout.session.async_payment_failed, checkout.session.expired and charge.refunded), then paste the endpoint’s signing secret back into the Webhook signing secret box. Entries are only marked paid after Stripe confirms the payment.
Step 4: Add Product and Total fields to your form
In the form builder, add a Product field and set its price. Mark it Required to always charge it, or leave it optional so visitors tick a box to add it. To offer choices, list options one per line as “Name | price”. Add a Total field so visitors see what they’ll pay.
Step 5: Choose when notifications go out
In the builder, open the Settings tab, then Add-ons → Payments. “Send notifications” defaults to “After the payment is confirmed (recommended)”, so you don’t get an email for an order nobody paid for. Optionally set a Payment description, shown on the Stripe receipt.
Step 6: Test with a Stripe test card, then go live
Publish the form, add it to a page, and submit it. You’re taken to Stripe Checkout; pay with one of Stripe’s test cards. The entry under Fennec Forms → Entries shows the payment status. When it works, switch Mode to Live and add your live keys and a live webhook the same way.
Good to know
- Fennec Press takes no fee on form payments, in the free plugin or in Pro. Stripe’s own processing fees still apply.
- Refunds are made in your Stripe dashboard; the entry updates automatically when Stripe reports the refund.
- Only Stripe is supported. Recurring payments (subscriptions) and promotion codes need Fennec Forms Pro; one-time payments are free.
- Selling memberships rather than one-off items? Fennec Members handles recurring access, also on your own Stripe account with no added fee.